
You can buy the product at my online shop:
No. 167 keyring--8 pieces
include:
round keyring 4 pieces
oval keyring 4 pieces
paper Work Grid (A6)
patterns (A4)
frame pattern (A4)
Work size of round keyring: 4.2cm
work size of oval deyring: 4.5cm, 3.4cm
How to use Paper Work Grid of round and oval keyring

.jpg)
Glue the Paper Work Grid onto parchment paper with tape, then perforate the holes of Paper Work Grid with 1-needle bold.
.jpg)
Turn to back and check whether had perforated all holes.

.jpg)
Emboss the circles between the 1-needle bold perforations with Extra Small Ball.
.jpg)
A second time perforate the holes with 1-needle bold.
.jpg)

Cut along the outside 1-needle bold perforations.
The frame was finished!
.jpg)

Emboss other way, first emboss outside semi-circles with Extra Small Ball.
.jpg)

Then emboss inner circles.
.jpg)
A second time perforate the holes with 1-needle bold.
.jpg)
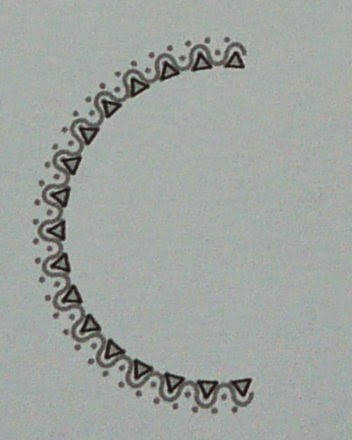
Cut all triangles.
.jpg)

Cut along the outside 1-needle bold perforations.
The frame was finished!
.jpg)
We can make any work inside the frame.
.jpg)
Put the works into thick book, they will become flat.
Glue Peel-off stickers onto the color paper.
.jpg)
.jpg)
Put the work into the keyring.
Completed!
To make an oval frame is the same way.
Completed!
To make an oval frame is the same way.
All samples of the round and oval keyring:
.jpg)
.jpg)

.jpg)
.jpg)
.jpg)
.jpg)
.jpg)
.jpg)
.jpg)
.jpg)
.jpg)
.jpg)
.jpg)
.jpg)
.jpg)
.jpg)
.jpg)
.jpg)
.jpg)
.jpg)
.jpg)
.jpg)
.jpg)


